Showing posts with label server. Show all posts

Sunday, May 28, 2017

Posted by beni in , , , , , , , , , , , , , , | May 28, 2017

700 Apache 2 4 HTTPS on Windows Server stops working after running for several hours


I was trying setup an Apache 2.4 server on Windows Server 2008 R2 to server static files for my web applications over SSL. It ran smoothly for couple hours and than hang forever. I tried to restart server every time it happens but it only last for several hours and then crashed again. It frustrated me and after looking to the configuration of Apache for a while, I finally make it works beautifully.


1. Enable MPM in httpd.conf with those settings:

By default, this MPM uses advanced Windows APIs for accepting new client connections. In some configurations, third-party products may interfere with this implementation, with the following messages written to the web server log:

Child: Encountered too many AcceptEx faults accepting client connections.
winnt_mpm: falling back to AcceptFilter none.
The MPM falls back to a safer implementation, but some client requests were not processed correctly. In order to avoid this error, use AcceptFilter with accept filter none.

AcceptFilter http none
AcceptFilter https none

# Server-pool management (MPM specific)
Include conf/extra/httpd-mpm.conf

For more information about MPM, please read this.

2. Increase the number of threads per child process in /extra/httpd-mpm.conf

<IfModule mpm_winnt_module>
    ThreadsPerChild      1000
    MaxRequestsPerChild    0
</IfModule>

3. Some minor changes in SSL configuration (/extra/httpd-ssl.conf)

Listen 443 https
...
ErrorLog "${SRVROOT}/logs/error_.log"
TransferLog "${SRVROOT}/logs/access_.log"

4. Restart Apache (in cmd) and see the magic

net stop Apache
net start Apache

Sunday, April 30, 2017

Posted by beni in , , , , , | April 30, 2017

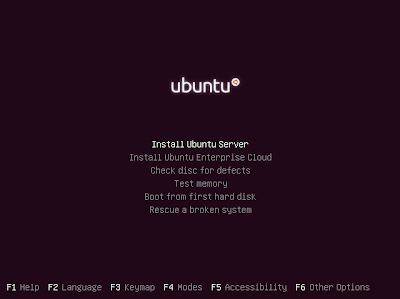
A guide to install Ubuntu Server


This installation of Ubuntu Server is performed on a PC with an optical drive, but you can alternatively use a USB flash drive too to boot into Ubuntu Server. The how-to to use a USB for installing any version of Linux is described step-by-step here.

Prior to the boot process, make sure that you have put the optical drive/USB drive up in the boot priority from the BIOS of your PC. Or, you can hit F12 repeatedly upon reboot until the boot menu comes along. 

Things to note down before you start to attempt the install. Get a pen and a paper, gentlemen and ladies!
  • All the drives letters and capacity and free space written next to it. You cant see drive letters of your drives while installing. So keeping them handy will be better in all the ways.
  • Your PCs IP address. Youll be asked for it just in the third step of installation. Jot it down.
  • Your PCs host name, if youve been given any. If you dont have one, you can write whatever you wish for to identify you in a network.
Thats it! Get ready for the ride!
     

        1.  Pop the CD/DVD in the optical drive compartment, or plug the USB flash drive in the PC.

        2.  Select Install Ubuntu Server from the menu.


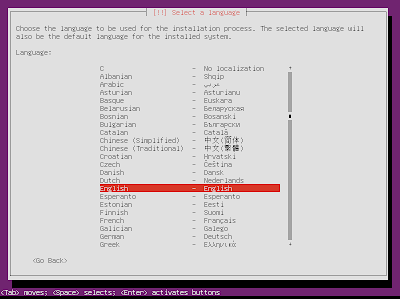
        3.  Select a desired language you want to install Ubuntu in, unless you dont want to get help of aliens to control your computer, select your mother tongue.
      

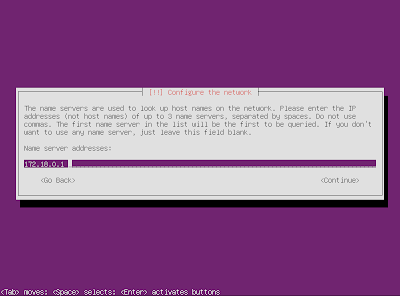
       4.   Put the IP address on the next screen.


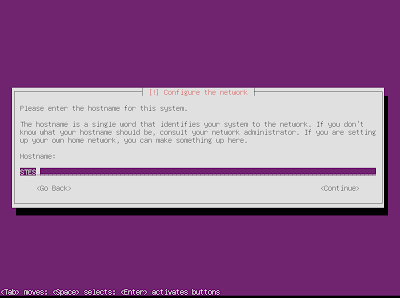
         5.  Enter the hostname. Or make up something.


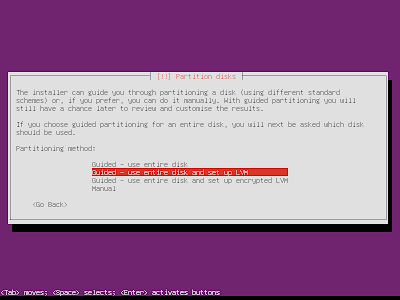
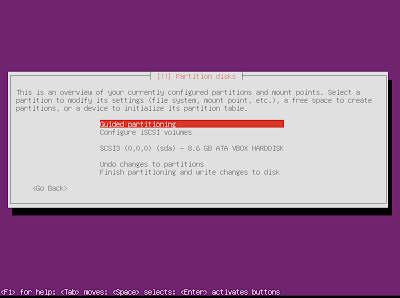
       6.   In the partition disk menu, select Guided - use entire disk and set up LVM.


       7.  In the next page, select Guided Partition for step-by-step process.


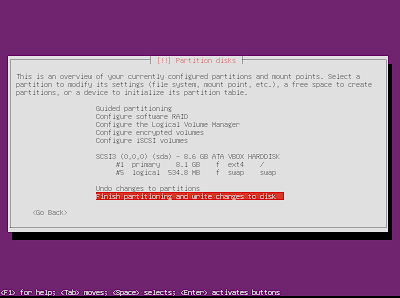
       8.  Again in the next page, select Finish partitioning and write changes to disk.


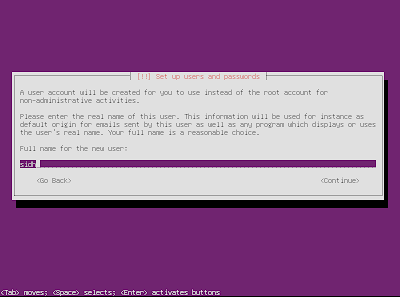
       9.  Set up the user and password for the new account.


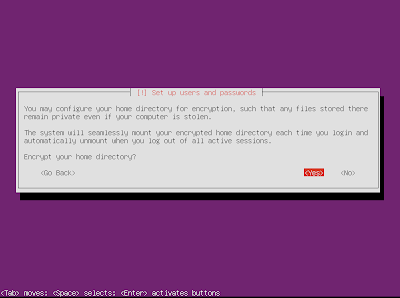
      10.  In the subsequent new screen, the OS asks you whether you want to encrypt your home directory. Select Yes.


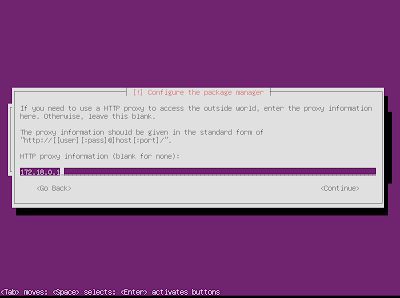
      11.   Enter HTTP proxy address.


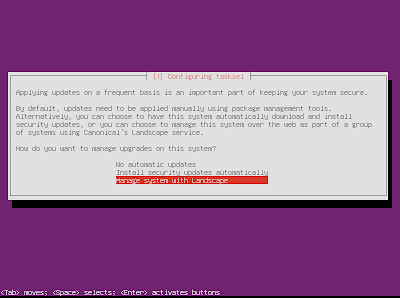
      12.  For the frequency of updates you want to install, its recommended that you should select manage system with Landscape.


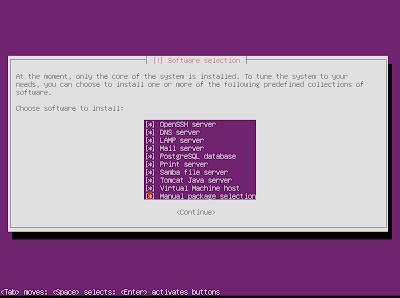
      13.   Select the software you want to install from the Software package manager, or proceed with continue option.

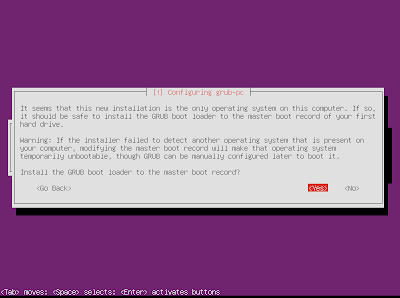
       14.   Select Yes in the GRUB Boot Installer option.


    15. Reboot you PC.

    So, you see that? It wasnt that tough after all! ;-)

If you found this article helpful, bookmark us, Like us at Facebook or share!

Happy computing!

Tuesday, April 18, 2017

Posted by beni in , , , , , , , , , , | April 18, 2017

A different approach to change MySQL root password in Ubuntu Server


The other day I was having a problem with the MySQL server on my Ubuntu machine. After connecting to mysql server in php, I could not select a database. The error was: Access denied for user @localhost to database foo. I did specify the user being root, but it keept saying I dont have permissions with the user (anonymous). Reinstalling mysql didnt do the job. So, lets delete the user .

1. Stop the MySQL Server:

sudo /etc/init.d/mysql stop

or
sudo service mysql stop

2. Start the mysqld:
sudo mysqld --skip-grant-tables &

Press CTRL+C (^C) to be able to enter the new command.
3. Login to mysql server:
sudo mysql -u root mysql

4. Delete the user :
If you enter the following command:
SELECT USER(),CURRENT_USER();

you will see that the users are different, one being and the other root.
Delete the anonymous user:
DELETE FROM mysql.user WHERE user = ;

Update root password (optional, if you know it):
UPDATE user SET Password=PASSWORD(1234) WHERE User=root;

5. Stop mysql server instance:
ps aux | grep mysql

On the second column, you will find the PID (process id) of mysql server. Kill it:
kill 20233

6. Start the usual mysql server:
sudo service mysql start


Resources: ubuntu.flowconsult.at

Search