Showing posts with label how. Show all posts

Saturday, June 24, 2017

Posted by beni in , , , , , , , , | June 24, 2017

6 GoogleAdsenseGuide How can we avoid to be blocked



Sunday, May 28, 2017

Posted by beni in , , , , , , , , | May 28, 2017

5 Step How to Install LibreOffice on Linux Mint


5 Step How to Install LibreOffice on Linux Mint

5 Step How to Install LibreOffice on Linux Mint - LibreOffice is an application for office. The LibreOffice have potentiality like Microsoft Office. But LibreOffice are available for Linux Operating System. This software are distribution for Debian, Ubuntu or Deterative of Ubuntu (Xubuntu, Kubuntu, BlackBuntu, etc).

The features of LibreOffice is :

  • Application for Word processor which called Writter.
  • Application for presentation which called Impress.
  • Application for numeric processor which called Calc.
  • Application for database processor which called  Base.
  • Application for drawing which called Drawing.
  • And some feaures for working at office.
For Install LibreOffice on Linux Mint open your Terminal and switch to super user (root) :
1. Download soruce og LibreOffice from this address http://www.libreoffice.org/download/. And than extract it using this command :
tar -xzfv LibreOffice*.tar.gz
2. And than, you can change the directory active to the directory [LibreOffice extracted]/DEBS. For example the name of the directory is LibreOffice_4.3.1_Linux_x86-64_deb. So use this command
cd LibreOffice_4.3.1_Linux_x86-64_deb/DEBS/
3. After you are on the DEBS directory, Now you can installing the deb file using this command.
dpkg -i *.deb
4. And now, still on your shell terminal, this is will make the LibreOffice are integration in the application menu. Move to desktop-integration directory.
cd desktop-integration
5. For finishing steps, install the menus deb file using this command.
dpkg -i *.deb
Please wait it, until all process are done. Enjoy it!! And thanks for your visit. More tutorial installing Libre Office :
  • 5 Step How to Install LibreOffice on Kali Linux.
  • How to Install LibreOffice on Backtrack.
Paper 4Share - 5 Step How to Install LibreOffice on Linux Mint

Friday, May 26, 2017

Posted by beni in , , , , , , , , , , | May 26, 2017

9th PAY REVISION COMMISSION REPORT FOR KERALA GOVERNMENT How to Fix Pay


Dear Friends

Please Do your Duty First, After that You can calculate your Scale. You are eating Public Money , So Calculate it  with out affecting Your Work.

Allowance for specs Increased, So I am using Small Font. 


New scales : 

1. 8500-230-9190-250-9940-270-11020-300-12220 

2. 8730-230-9190-250-9940-270-11020-300-12220-330-12550

3. 8960-230-9190-250-9940-270-11020-300-12220-330-13210 

4. 9190-250-9940-270-11020-300-12220-330-13540-360-14620

5. 9940-270-11020-300-12220-330-13540-360-14980-400-15380

6. 10480-270-11020-300-12220-330-13540-360-14980-400-16980-440-17420

7. 11620-300-12220-330-13540-360-14980-400-16980-440-18740

8. 13210-330-13540-360-14980-400-16980-440-18740-500-20740

9. 13900-360-14980-400-16980-440-18740-500-21240-560-22360

10. 14620-360-14980-400-16980-440-18740-500-21240-560-23480

11. 15380-400-16980-440-18740-500-21240-560-24040

12. 16180-400-16980-440-18740-500-21240-560-24040-620-27140

13. 16980-440-18740-500-21240-560-24040-620-27140-680-29180

14. 18740-500-21240-560-24040-620-27140-680-29860-750-31,360 

15. 19240-500-21240-560-24040-620-27140-680-29860-750-32110

16. 20740-500-21240-560-24040-620-27140-680-29860-750-32860-820-33680

17. 21240-560-24040-620-27140-680-29860-750-32860-820-34500

18.22360-560-24040-620-27140-680-29860-750-32860-820-35320

19. 24040-620-27140-680-29860-750-32860-820-36140

20. 29180-680-29860-750-32860-820-36140-900-40640

21.32110-750-32860-820-36140-900-40640-1000-44640

22.36140-900-40640-1000-46640

23. 40640-1000-48640-1100-54140

24. 42640-1000-48640-1100-55240

25. 44640-1000-48640-1100-56340

26. 46640-1000-48640-1100-57440-1200-58640

27.48640-1100-57440-1200-59840


PAY FIXATION
1. Basic Pay (pre revised scale)at the Option date You  have chosen.
2. 64%of DA to be merged.
3. Fitment Benefit(10% of pre revised basic pay OR minimum of Rs.1000)
4. Total of 1+2+3
5. fix the stage in the revised scale
6. Service weightage : 0.5% for every year of service(suppose u have 6 year of service at the date of option,u have got 3% of revised basic pay as service weightage)
7. Total 5+6
8. fix the stage in the revised scale as u r Basic Pay at the option date.


64%DA merged,remaining 14% continuing

Above information is not 100% official. Please verify official data for more clarity.

Thursday, May 18, 2017

Posted by beni in , , , , , , , , | May 18, 2017

8 GoogleAdsenseGuide How to increase income from Google Adsense


Did you know that the standard Google AdSense advert is not the best and most effective one?
If youve been using Google AdSense already, youll know that there are different advert formats that you can try on your website.
The most important thing that you can do to improve your Google AdSense income is to increase the click-through rate or CTR For example,
*1000 pages visits, with a 1% CTR, is 10 clicks
*1000 page visits, with a 10% CTR, is 100 clicks
Which would you rather have? Google AdSense does not allow detailed discussions of actual CTRs but implementing the following hints and tips improved my AdSense income, literally overnight. If you are using the Leaderboard, Banner or Skyscraper adverts, then you are not using the most effective advert, in terms of CTR. By using the 336 x 280 Large Rectangle and 250 x 250 Square, you will instantly improve your CTR. Changing the colours of the text and background of your Google AdSense advert can also improve CTR.
You can do this by visiting colour palettes on the "AdSense for Content" page. The standard colour for the Linked Title is a royal blue and the advertiser-url is a green. By changing the Linked Title to a dark blue and the Advertiser URL to a light grey, you will also improve your CTR and hence your income. If your page background is coloured, then changing the background colour of your advert to match, making the advert blend in on the page, once again improves your CTR. Do experiment with what works for you site - for some sites, the right color could be yellow, purple or pink - find out what works for you and use it! For further hints and tips on improving your Google AdSense income, visit Google AdSense Secret

Wednesday, April 26, 2017

Posted by beni in , , , , , , , , | April 26, 2017

5 Step How to Install LibreOffice on Kali Linux


How to Install LibreOffice on Kali Linux

Below is old tutorial, for new update plase go here

[New Update] How to Install LibreOffice on All Linux Version


How to Install LibreOffice on Kali Linux - LibreOffice is a software that work like Microsoft Office.
LibreOffice can running on all of Linux Operating System Platform, for example is all of debian and derivatives, fedora and derivatives, radhat and other linux family. With using LibreOffice on our computer, linux users can write a document, calc, impress, Math, draw, and base. On the default Kali Linux, the LibreOffice is not available, so Kali Linux users must installed byself.

1. The ways to install LibreOffice on Kali Linux is not much different from the how to install LibreOffice on backtrack. First you must download source of LibreOffice from http://www.libreoffice.org/download/. And than extract it using command below :
tar -xzf LibreOffice*.tar.gz
2. After tar.gz file was extracted, enter on the directory [LibreOffice dir extracted]/DEBS. If the name of directory extracted like this "LibreOffice_4.3.1_Linux_x86-64_deb", so follow the below
cd LibreOffice_4.3.1_Linux_x86-64_deb/DEBS/
3. If you are already on the DEBS directory, install the deb file. Usre this command
dpkg -i *.deb
4. After it, dont close your shell terminal, this step will make the LibreOffice are integration in the aplication menu. Go to on desktop-integration dir.
cd desktop-integration
5. And the last command, install the menus deb file using this command below
dpkg -i *.deb
Wait until that proccess finish, enjoy it !!

New UPDATE

If this tutorial is not working, you can try this tutorial How to Install LibreOffice on All Linux Version

Thanks for visit Paper 4Share, if this article are usefull, vote google+ below

Paper 4Share -  How to Install LibreOffice on Kali Linux

Friday, April 7, 2017

Posted by beni in , , , , , , , | April 07, 2017

7 GoogleAdsenseGuide How to apply for Google Adsense


To get an adsense account it is very easy and you can apply for this service without any hesitation. The instructions are very simple. Just follow the following instructions that you can easily create an adsense account.
1.First of all open your Internet Browser (IE or Firefox. etc) and type the following URL in
Address bar
http://www.google.com/adsense
2.Now you can see a website will open that is necessary to create your account on right side you will see a BLUE button which display a message on it called "Signup Now" Just click on it.
3.An application form will open that is requiring your full information to create adsense add count you should put the right information about you in this form. At last you see an agreement please also read it.
4.After writing full information click on the "Submit Info" then your form will submit.
5.At last Google shall verify your website if your website meet the requirements of Google then it will be very grateful for you. Then Google send you an E-mail regarding Adsense Account information and you will be able to handle your account.

Thursday, April 6, 2017

Posted by beni in , , , , , , , , , | April 06, 2017

6 Best BURG Themes and How to Install BURG Themes in Ubuntu


Ive been frustrated with the new boot loaders contained in Ubuntu Mate and others lately. So here is an old post on how to customize the bootloader menu with Burg. An update for Ubuntu 14.04 is posted after.

BURG is basically a boot loader for Linux based on GRUB. Burg has a highly configurable menu system which works in both text and graphic mode. Simply put, BURG can be extensively customized and there are a number of good quality BURG themes available all over the web for free. Lets find out the best among them and also see how to install BURG and the following BURG themes in Ubuntu 11.10.
top burg themes

  • Lightness BURG Theme by SWOriginal
Dark Shine BURG theme
  • Dark Shine BURG Theme by SWOriginal
Autumn BURG theme
  • Autumn BURG Theme
abstract BURG theme
  • Abstract BURG Theme
Radiance BURG Theme
  • Radiance BURG Theme by Shafin
Fortune BURG Theme

  • Fortune BURG Theme by OrphanShadow
Super Boot Manager Lets You Install/Manage all the Above BURG Themes & More!
  • Many BURG themes listed above has specific scripts to install it as your default BURG theme. But Super Boot Manager has all the above themes listed in it and it is quite easy to install and change BURG themes in your Ubuntu 11.10 using Super Boot Manager.
  • Warning: Playing around with GRUB bootloader can be tricky and can sometimes cause irrecoverable damages, you should know what you are doing.
  • Lets install BURG in Ubuntu 11.10 first of all. Do the following in Terminal.
sudo add-apt-repository ppa:n-muench/burg 
sudo apt-get update
sudo apt-get install burg burg-themes
  • Done. Now install BURG to your MBR(Master Boot Record). Substitute hd0 with appropriate drive information in the following command if needed(you dont have to do that under normal circumstances).
sudo burg-install "(hd0)"
  • Now, update BURG.
sudo update-burg
  • There are some pre-installed BURG themes that comes with the package, you can test them and install them using the following command.
sudo burg-emu
BURG themes Ubuntu 11.10
  • F2 to browse through themes and F1 to see full list of options. Done.
Install Super Boot Manager in Ubuntu 11.10, Linux Mint 12
  • Do the following in Terminal.
sudo add-apt-repository ppa:ingalex/super-boot-manager 
sudo apt-get update
sudo apt-get install super-boot-manager
  • Done. Now launch Super Boot Manager and select Burg Manager - Themes.
super boot manager for managing burg themes
  • Select the theme you like and double click on it. That particular BURG theme will be automatically downloaded now. Apply the changes and you are done. 
Theoretically speaking, this should work. But unfortunately, I had to use sudo burg-emu command (from above) every time to change to the theme just downloaded using Super Boot Manager app. Good luck and thanks for reading.

Source: http://www.techdrivein.com/2011/12/6-best-burg-themes-and-how-to-install.html

UPDATE
BURGbootloader setup and configuration tutorial - Ubuntu 14.04


BURG on Ubuntu... lets get this going

Hi, this is a quick and easy tutorial on setting up BURG in Ubuntu linux. This tutorial is written specifically based on Ubuntu 14.04.

Warning : Changing the bootloader can be a dangerous operation if unexperienced. If you fail setting up the bootloader correctly your operating system may not boot. Continue with this tutorial at own risk.

Basic install

1. Firstly, were going to want to add the repository for burg, then install it. Open a terminal ( Ctrl + t ) and execute the following commands.


sudo add-apt-repository ppa:n-muench/burg
sudo apt-get update
sudo apt-get install burg burg-themes
 
 
2. Now that we have BURG installed, its time to configure it as our bootloader. Execute the following commands ( remember to substitute "hd0" with your correct boot drive ).


sudo burg-install "(hd0)"
sudo update-burg
sudo burg-emu
 
 
After executing burg-emu, a preview of your bootloader should open. Your bootloader should now be installed and setup as default in front of GRUB. You can, at this point, optionally reboot to test it out.

Depending on your install of Ubuntu, you may have more than one boot and one recovery image. These will all display on boot unless disabled. If you are not getting redundant options when you run sudo burg-emu , skip to the next part of the tutorial.
Fix redundant options:


sudo add-apt-repository ppa:danielrichter2007/grub-customizer
sudo apt-get update
sudo apt-get install grub-customizer
 
 
Open grub customizer after install and disable all images that you dont want as boot options. Run  

sudo burg-emu

to check your changes.

Install BURG theme

We alreadly installed some default themes earlier. To check them out and/or enable them, run

 sudo burg-emu

then click F3.
To install a third party theme:
Copy your downloaded theme to /boot/burg/themes then update burg.

sudo update-burg

You should now be able to preview and enable your theme from the burg-emu theme menu.

Fix resolution issue

On some installs, BURG does not automatically scale to the size of your monitor. We will configure it manually in the following.
First, well need to install super boot manager. At the time of writing, the repo has not deployed it for Ubuntu 14.04. Well use a little trick to get around that.


sudo add-apt-repository ppa:ingalex/super-boot-manager
sudo sh -c "sed -i s/trusty/raring/g /etc/apt/sources.list.d/ingalex-super-boot-manager-trusty.list"
sudo apt-get update
sudo apt-get install super-boot-manager
sudo apt-get install -f


Now finally, launch super boot manager.
Choose Burg-manager > parameters > change resolution . You can also change the Default boot device as well as make some other nice customizations with this program. Run sudo burg-emu to check the results of your changes.

Source: http://develop.alpdesigns.ch/pages/ubuntu/brug-and-theme-configuration.html

Tuesday, April 4, 2017

Posted by beni in , , , , , , , , , | April 04, 2017

6 tips for how to Bypass Limited Access an Internet


6 tips for how to Bypass Limited Access an Internet
How to Bypass Limited Access an Internet - On the every network, usually there are some limited access on website. For example, on the your office, your network are deny if you are accessing Facebook or twitter. The network are configured by adminstrator of network. That problem can be solve if you are using this way.

Below is the way for bypass limited access on your network :

1. Using IP Proxy

You can get an IP Proxy via the list below :
  • https://www.hidemyass.com/
  • www.ip-adress.com/proxy_list/
  • http://incloak.com/proxy-list/
select one of that IP Proxy, and than plug in your Web Browser.

2. Using HideMyAss Addons

On the web browser Mozilla Firefox ware developed an addons HideMyAss. With using this addons your web browser automatically was used a proxy. For get that addons visit this adderss https://addons.mozilla.org/en-US/firefox/user/hidemyass/

3. Using SSH Tunneling

What is SSH Tunneling click here. But if your are using this way, you must having a SSH Account, or you can searching that at google for free.

4. Using Web Proxy

There are many website which provide a fitur of Web Proxy. For example http://incloak.com on the above it, there is a field for fill URL which will bypassed.

5. Using Google as Proxy

Without realizing there google features that can be used as a proxy. One of that feature is Google Translate. How to use it, below an example :
http://translate.google.com/translate?sl=ja&tl=en&u=http://webexample.com/ [Example]

6. Using Psiphon3

With running this tools,  we was creating an local proxy. That proxy form SOCK5 or HTTP proxy. Visit here download that Psiphon3 https://s3.amazonaws.com/0ubz-2q11-gi9y/en.html

Now, you dont worry again if your network were limited access. If this article are usefull, please give me +1 and dont forget for share this acticle via buttons below. Thanks for your visit. I Hope usefull :)

Paper 4Share - How to Bypass Limited Access on Your Network

Wednesday, March 18, 2015

Posted by beni in , , , , , , , | March 18, 2015
Hi guys, welcome back to my blog. This blog is written based on the badminton instruction book that is called Badminton: Steps to Success by Tony Grice. Today, Im going to show you the footwork in badminton. As we all know, footwork is always important in sports. Correct footwork could avoid terrible injuries for players, and it also helps players to dominate their opponents. Badminton requires fast movement so correct footwork will improve the quality of your game.

Ready Position


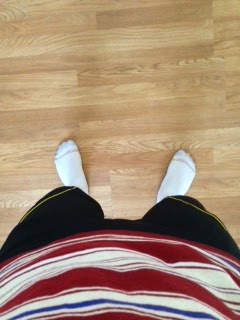
According to Tony Grice, the author of Badminton: Steps to Success (the book that Im reading), ready position enables you to move as quickly as possible for actions (Grice 3). In badminton, a 1- shot rally between you and your opponent is usually under 1 second. Thats why you need to have a good ready position so that you can act fast. So here is the correct description of a good ready position:

  • Your feet are spread about shoulder width apart with you knees lightly bent. (3)
  • Your feet are square or slightly staggered with the dominant slightly forward of the non-dominant foot. (3)
  • Hold the racket in basic grip.
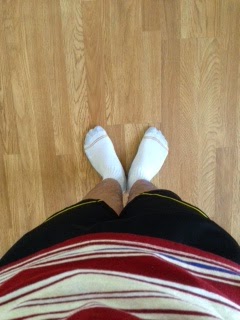
Here is the visual example of the correct ready position.


    Foot Movement in Badminton
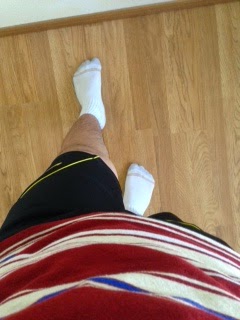
    There are four types of movement in badminton: step- close, shuffle, Sashay, and three- step sequence (Grice 4).  Each type is applied for different types of shots. Or it could be used depend on the position which you are staying at on the court. Good movement will dramatically improve your game. Believe me, in badminton, although you have a perfect stroke, terrible movement could shut you down in a match. Here are the demonstrations of good movement in badminton.
    I. Step- close: this step is the 2nd most common in the movement. It is used for high forehand stroke (lob, smash...). This step is applicable for  75% the surface of the badminton court (except the bottom left corner). Here is the instruction
        1. Start with ready position, dominant foot is always the pivot and the non- dominant (non- racket) is the leader (Grice 4)

        2. Turn you body to 45 degree angle to the right, at the same time, open your right foot so that the gap between feet is equal to your shoulder length.

        3. Move your left foot back so that your feet will be parallel to the net, with your face faces toward the net, back to ready position
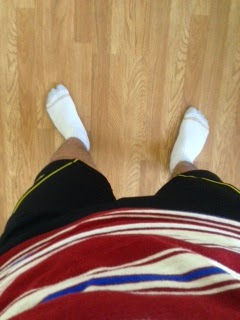
    II. Shuffle: this is the most common step in badminton. It could be applied to every single high strokes for both forehand and backhand. This could be used in the whole court. This is also the easiest one. 
         1. Start from ready position.

         2. Simply shuffle by your racket foot (if you are left- handed, that is left foot) toward the the place you want to go

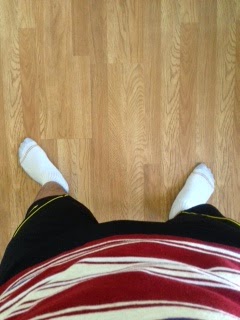
    Then..
    Finished by...


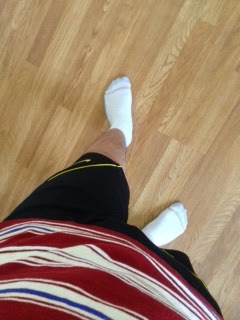
    III. Sashay step: this step is used for on the net play, usually for forehand net-play. This step provides stability and flexibility for the player, help them to control the shot better.

         1. Start from ready position.

         2. Move your racket foot toward the net for a 45 degree angle.


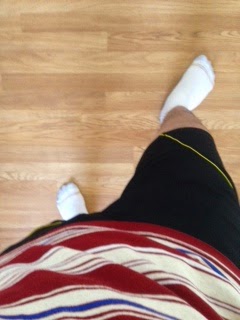
         3. Scissoring your other foot so that your feet will look like this.


         4. Repeat step 2.

         
    IV. Three- step sequence: this step allow you to move further and faster (Grice 7). It also allow you to recover faster to return the opponents stroke. This step is used to move from backhand net to the its straight line til the end of the court. Here is the instruction.
         1. Start from back- hand net play position.

         2. Move your racket foot backward so that your front side will face the net.


            * The racket foot has to be behind the non- racket foot for a shoulder length.

         3. Repeat step 1

            * This time, your front side will form a line that will intersect the net at a 45 degree angle.

         4. Return to ready position


    Question: Which movement (footstep) is the best fit for you?


    MLA Citation:

    Jerby. "Thread: Stance When Receiving Server (doubles)." Badminton Central Discussion Forums RSS. Badminton Central, 12 Aug. 2009. Web. 31 Dec. 2014.
    Grice, Tony. Badminton: Steps to Success. Champaign, IL: Human Kinetics, 1996. Print.


    Search